How To Add Your WordPress Website To Google Search Console
By linking your WordPress website to Google Search Console, you obtain useful insights into the performance, search queries, and indexing status of your website. We will lead you through the process of integrating your WordPress website to Google Search Console, allowing you to harness this crucial tool for optimizing your website’s exposure on search engines.

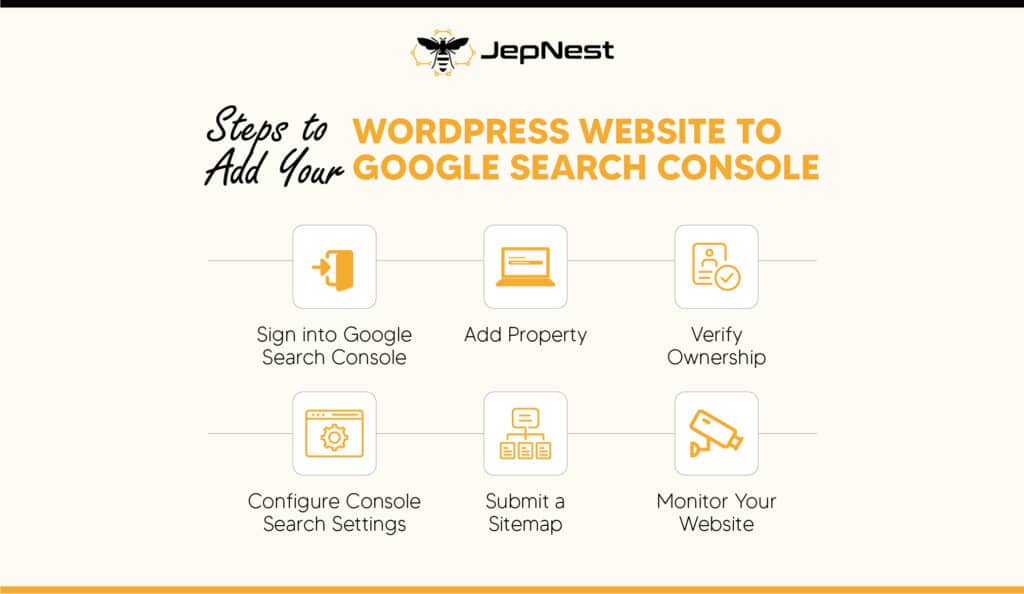
1. Sign into Google Search Console
- First visit the Google Search Console website by entering the following URL in your web browser https://search.google.com/search-console.
- Sign into your Google account. If you don’t have a Google account, click on the “Create account” button to set up a new one.
2. Add Property
- After signing in, you will be redirected to the Google Search Console dashboard. Click on the “Add Property” button.
- And then, in the URL prefix field, you will enter the URL of your WordPress website like for example https://www.example.com.
- Click on the “Continue” button to proceed.
3. Verify Ownership
There are multiple methods to verify ownership of your website. We will cover the most common method using the HTML tag.
- Select the “HTML tag” verification method.
- Copy the provided HTML tag, which will look similar to <meta name=”google-site-verification” content=”xxxxxxxxxxxxxxxxxxxx” />.
- Log in to your WordPress dashboard.
- In the left-hand menu, go to “Appearance” and click on “Theme Editor.”
- On the right-hand side, under “Theme Files,” click on “Theme Header (header.php).”
- Locate the <head> section within the code editor.
- Paste the copied HTML tag just before the closing </head> tag.
- Save the changes by clicking on the “Update File” button.
- Return to the Google Search Console tab and click on the “Verify” button.
4. Configure Search Console Settings
- Once ownership is verified, then you will be directed to the Google Search Console dashboard for your website.
- Click on the “Continue” button to proceed.
- In the sidebar, click on “Settings.”
- Under “Domain properties,” select your preferred version (with or without “www”) for your website’s URL.
- Save the changes by clicking on the “Save” button.
5. Submit A Sitemap
Submitting a sitemap helps Google understand the structure and organization of your website.
- In the sidebar, click on “Sitemaps.”
- Click on the “Add/Test Sitemap” button.
- Enter sitemap.xml in the provided field.
- Click on the “Submit” button.
6. Monitor Your Website
Congratulations! You have successfully added your WordPress website to Google Search Console. Now, you can monitor your website’s performance, index status, search analytics, and more.
Explore the various reports and features available in Google Search Console to gain insights into your website’s search visibility and make informed decisions to improve its performance.
Finally, by following the step-by-step instructions, you have learnt how to link your WordPress website to Google Search Console. Using this sophisticated tool will give you useful data and insights to help you optimize your website’s visibility in Google search results. Monitor your website’s performance on a regular basis and take the required measures to improve its visibility, thereby bringing more organic traffic to your WordPress website.